1. Giới thiệu Dialog trong Android
Dialog trong Android là một cửa sổ nhỏ dùng để nhắc người dùng đưa ra quyết định hoặc nhập thông tin.
Thỉnh thoảng trong ứng dụng của bạn, nếu bạn muốn hỏi người dùng về quyết định giữa có hoặc không để phản hồi bất kỳ hành động cụ thể nào do người dùng thực hiện, bằng cách giữ nguyên hoạt động và không thay đổi màn hình, bạn có thể sử dụng hộp thoại cảnh báo (Alert Dialog).
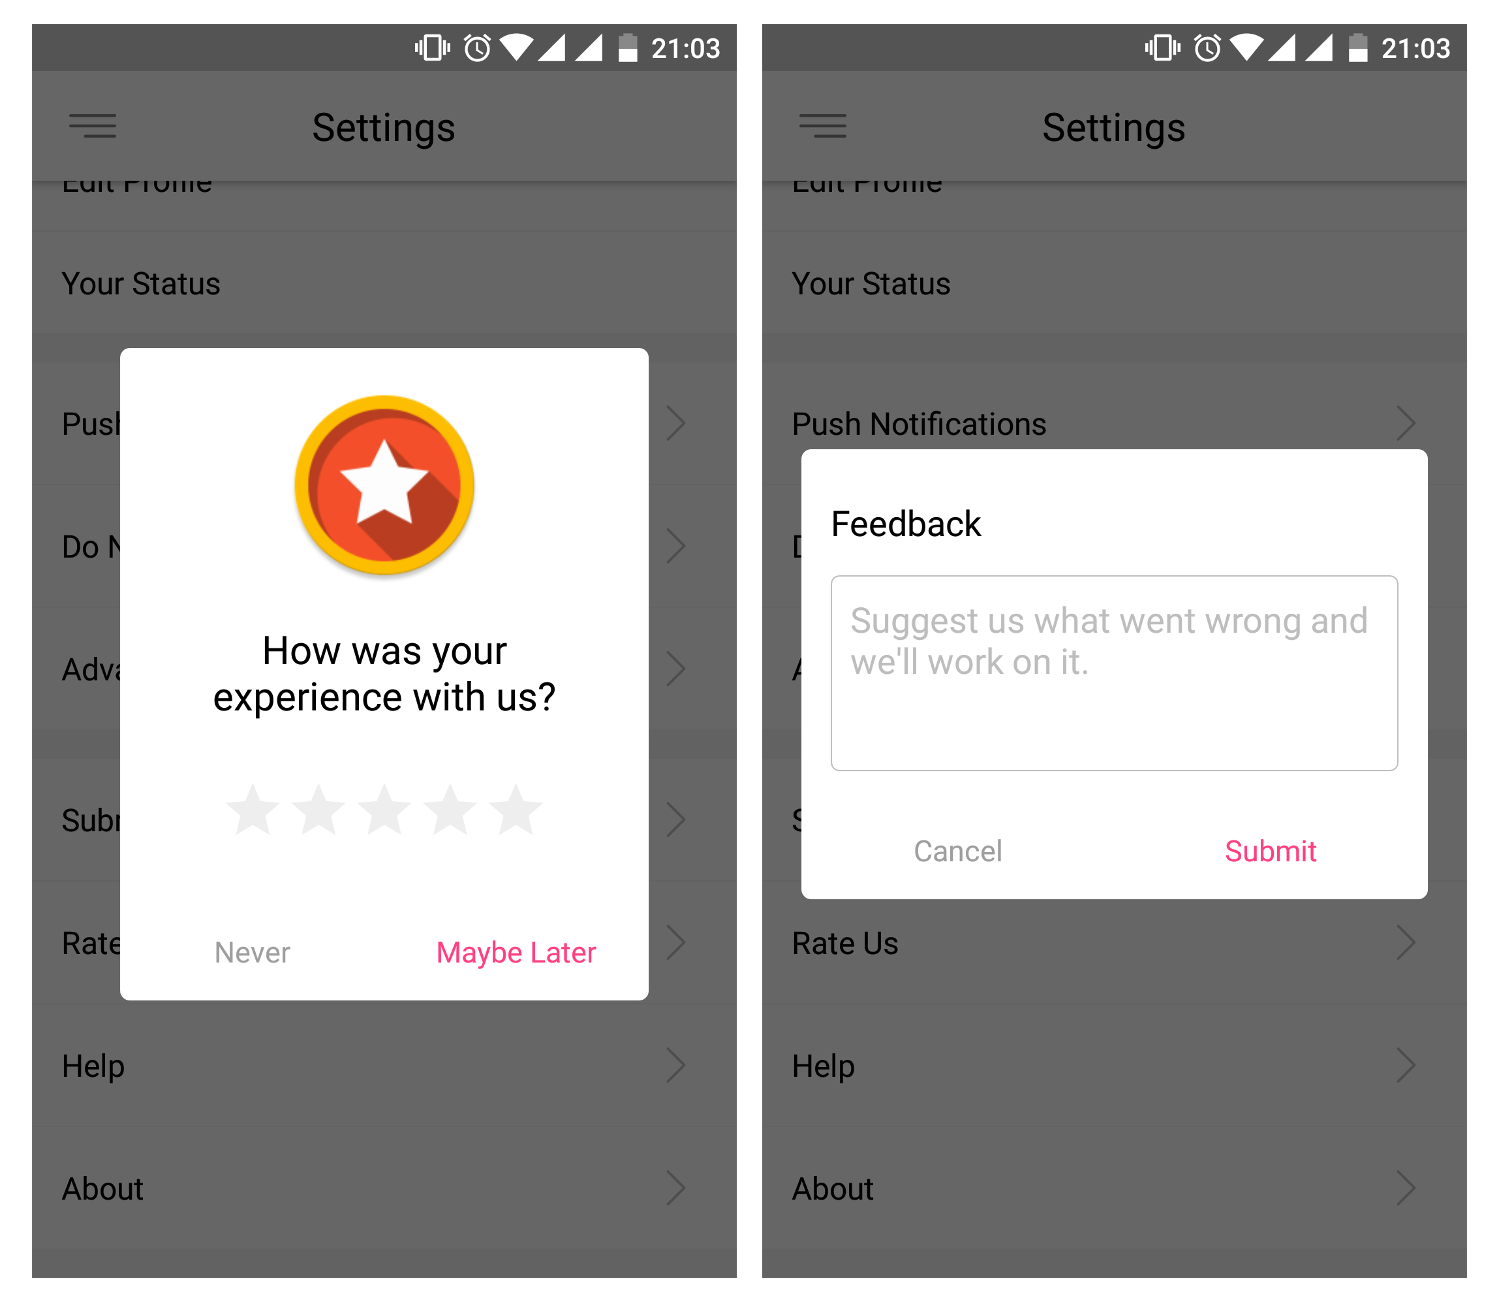
Có nhiều loại Dialog như ListDialog hay AlertDialog nhưng bạn có thể tùy chỉnh giao diện của Dialog sao cho phù hợp với ứng dụng của mình.
Giao diện của 1 Dialog tùy chỉnh giao diện.
2. AlertDialog
Để hiển thị hộp thoại cảnh báo (Alert Dialog), bạn cần tạo một đối tượng của AlertDialogBuilder theo câu lệnh sau:
AlertDialog.Builder b = new AlertDialog.Builder(this);Bây giờ, bạn có thể thiết lập nút đồng ý (yes) hoặc nút không đồng ý (no) bằng cách sử dụng đối tượng đã tạo ở trên.
//Nút đồng ý
b.setPositiveButton(String caption, listener);
//Nút không đồng ý
b.setNegativeButton(String caption, listener);
Một số phương thức thường dùng với Alert Dialog
setIcon(Drawable icon): Phương thứ này thiết lập icon cho AlertDialog
setTitle(String title): Phương thức này thiết lập tiêu đề.
setMessage: Phương thức này thiết lập thông điệp.
Ví dụ tạo AlertDialog trong Android
//Tạo đối tượng
AlertDialog.Builder b = new AlertDialog.Builder(this);
//Thiết lập tiêu đề
b.setTitle("Xác nhận");
b.setMessage("Bạn có đồng ý thoát chương trình không?");
// Nút Ok
b.setPositiveButton("Đồng ý", new DialogInterface.OnClickListener() {
 public void onClick(DialogInterface dialog, int id) {
  finish();
 }
});
//Nút Cancel
b.setNegativeButton("Không đồng ý", new DialogInterface.OnClickListener() {
 public void onClick(DialogInterface dialog, int id) {
  dialog.cancel();
 }
});
//Tạo dialog
AlertDialog al = b.create();
//Hiển thị
al.show();
2. List Dialog
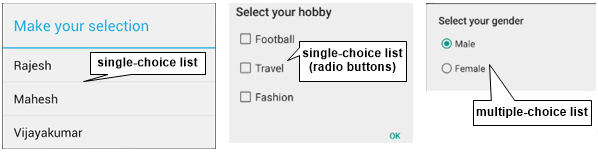
Hiển thị danh sách lựa chọn trong dialog. Có 3 loại list dialog được hỗ trợ trong android bao gồm single-choice list, single-choice list (radio buttons) và multiple-choice list (checkboxes).
Tạo single-choice list
//Items
String[] items = {"Rajesh", "Mahesh", "Vijayakumar"};
AlertDialog.Builder b = new AlertDialog.Builder(getActivity());
//Thiết lập title
b.setTitle("Make your selection");
//Thiết lập item
b.setItems(items, new DialogInterface.OnClickListener() {
 //Xử lý sự kiện
 public void onClick(DialogInterface dialog, int which) {
 }
});
//Hiển thị dialog
b.show();
Tạo single-choice list (radio buttons)
//Items
String[] datas = {"Male", "Female"};
AlertDialog.Builder b = new AlertDialog.Builder(this);
b.setSingleChoiceItems(datas, 0, new DialogInterface.OnClickListener() {
 @Override
 public void onClick(DialogInterface dialog, int which) {
 }
});
b.show();
Tạo multiple-choice list (checkboxes)
String[] datas = {"Football", "Travel", "Fashion"};
ArrayList al = new ArrayList();
AlertDialog.Builder b = new AlertDialog.Builder(getActivity());
b.setMultiChoiceItems(datas, null,new DialogInterface.OnMultiChoiceClickListener(){
 @Override
 public void onClick(DialogInterface dialog, int which, boolean isChecked) {
  //Nếu người dùng chọn
  if (isChecked) {
   //Thêm người dùng người dùng chọn vào ArrayList
   al.add(datas[which]);
  }
 }
 });
b.show();
3. Custom Dialog
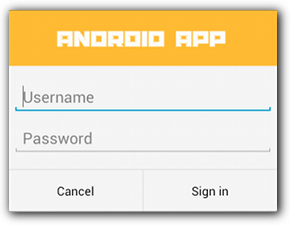
Custom Dialog được sử dụng rất nhiều trong các ứng dụng, ví dụ như form đăng nhập hay đăng ký chẳng hạn, các bạn rất dễ bắt gặp những dạng custom dialog như vậy.
File layout:
<?xml version="1.0" encoding="utf-8"?>
<LinearLayout xmlns:android="http://schemas.android.com/apk/res/android"
    android:orientation="vertical"
    android:layout_width="fill_parent"
    android:layout_height="fill_parent"
     >
    <TextView
        android:textSize="20dp"
        android:layout_height="wrap_content"
        android:id="@+id/textView1"
        android:text="vncoder.vn"
        android:layout_width="wrap_content"
        android:layout_gravity="center_horizontal"
        android:layout_weight="1">
    </TextView>

    <Button android:layout_width="match_parent"
        android:id="@+id/btnLoginDialog"
        android:text="show dialog"
        android:layout_gravity="center_vertical"
        android:layout_height="wrap_content">

    </Button>
</LinearLayout>
Tạo tập tin login_dialog.xml trong layout :
<?xml version="1.0" encoding="utf-8"?>
<LinearLayout xmlns:android="http://schemas.android.com/apk/res/android"
    android:orientation="vertical"
    android:layout_height="match_parent"
    android:layout_width="300dp"
    android:paddingTop="10dp">
    <EditText android:layout_height="wrap_content"
         android:id="@+id/edtUsername"
        android:layout_width="match_parent">
        <requestFocus></requestFocus>
    </EditText>
    <EditText
        android:id="@+id/edtPassword"
        android:layout_height="wrap_content"
        android:inputType="textPassword"
        android:layout_width="match_parent">

    </EditText>
    <LinearLayout android:layout_width="match_parent"
        android:layout_height="wrap_content"
        android:id="@+id/linearLayout1">
        <Button android:layout_width="wrap_content"
            android:layout_height="wrap_content"
            android:layout_weight="0.5"
            android:id="@+id/btnLogin"
            android:text="Login">
        </Button>
        <Button android:layout_width="wrap_content"
            android:layout_height="wrap_content"
            android:layout_weight="0.5"
            android:id="@+id/btnCancel"
            android:text="Cancel">
        </Button>
    </LinearLayout>
</LinearLayout>
Xử lý sự kiện onClick trong MainActivity:
public void onClick(View v) {
		// TODO Auto-generated method stub
		final EditText edtUserName, edtPassword;
		Button btnLogin, btnCancel;
		AlertDialog.Builder dialogBuilder =	new AlertDialog.Builder(this);
		LayoutInflater inflater	= this.getLayoutInflater();
		View dialogView	=	inflater.inflate(R.layout.login_dialog, (ViewGroup)findViewById(R.layout.activity_main));
		edtUserName	=	(EditText)	dialogView.findViewById(R.id.edtUsername);
		edtPassword	=	(EditText)	dialogView.findViewById(R.id.edtPassword);
		btnLogin	=	(Button)	dialogView.findViewById(R.id.btnLogin);
		btnCancel	=	(Button)	dialogView.findViewById(R.id.btnCancel);
		btnLogin.setOnClickListener(new OnClickListener() {
			@Override
			public void onClick(View v) {
				// TODO Auto-generated method stub
				if(edtUserName.getText().equals("vncoder.vn")&& edtPassword.getText().equals("hiepsiit")){
		        	Toast.makeText(MainActivity.this, "Đăng nhập thành công", Toast.LENGTH_LONG).show();
		        	finish();
		        }
				else
					Toast.makeText(MainActivity.this, "Đăng nhập không thành công", Toast.LENGTH_LONG).show();
			}
		});
		btnCancel.setOnClickListener(new OnClickListener() {

			@Override
			public void onClick(View v) {
				// TODO Auto-generated method stub
				finish();
			}
		});
		dialogBuilder.setView(dialogView);
		dialogBuilder.setTitle("Đăng nhập");
		AlertDialog b = dialogBuilder.create();
		b.show();

	}